教學 7 - 啟動此(第三方)
到目前為止,我們建立的應用程式只使用了我們自己的程式碼,加上 BeeWare 提供的程式碼。但是,在現實應用程式中,您可能需要使用從 Python Package Index (PyPI) 下載的第三方程式庫。
讓我們修改我們的應用程式以包含第三方程式庫。
新增套件
讓我們修改應用程式,讓它不只是說「嗨,你好!」。
要為對話框產生一些更有趣的文字,我們要使用一個叫做 Faker 的函式庫。Faker 是一個 Python 套件,可以產生虛假內容,包括名稱和文字區塊。文字區塊中的名稱和字詞是由 Faker 提供的任意字詞清單產生的。我們要使用 Faker 來建構一個虛假的訊息,就好像有人在回應使用者一樣。
讓我們為我們的應用程式新增一個httpx API 呼叫。將導入新增至app.py頂部以導入httpx:
import faker
要使我們的教程異步,請修改 say_hello() 事件處理程序,使其如下所示:
async def say_hello(self, widget):
    fake = faker.Faker()
    await self.main_window.dialog(
        toga.InfoDialog(
            greeting(self.name_input.value),
            f"A message from {fake.name()}: {fake.text()}",
        )
    )
讓我們在公文包開發者模式下運行更新後的應用程序,以檢查我們的更改是否有效。
(beeware-venv) $ briefcase dev
Traceback (most recent call last):
File ".../venv/bin/briefcase", line 5, in <module>
    from briefcase.__main__ import main
File ".../venv/lib/python3.13/site-packages/briefcase/__main__.py", line 3, in <module>
    from .cmdline import parse_cmdline
File ".../venv/lib/python3.13/site-packages/briefcase/cmdline.py", line 6, in <module>
    from briefcase.commands import DevCommand, NewCommand, UpgradeCommand
File ".../venv/lib/python3.13/site-packages/briefcase/commands/__init__.py", line 1, in <module>
    from .build import BuildCommand  # noqa
File ".../venv/lib/python3.13/site-packages/briefcase/commands/build.py", line 5, in <module>
    from .base import BaseCommand, full_options
File ".../venv/lib/python3.13/site-packages/briefcase/commands/base.py", line 14, in <module>
    import faker
ModuleNotFoundError: No module named 'faker'
(beeware-venv) C:\...>briefcase dev
Traceback (most recent call last):
File "...\venv\bin\briefcase", line 5, in <module>
    from briefcase.__main__ import main
File "...\venv\lib\python3.13\site-packages\briefcase\__main__.py", line 3, in <module>
    from .cmdline import parse_cmdline
File "...\venv\lib\python3.13\site-packages\briefcase\cmdline.py", line 6, in <module>
    from briefcase.commands import DevCommand, NewCommand, UpgradeCommand
File "...\venv\lib\python3.13\site-packages\briefcase\commands\__init__.py", line 1, in <module>
    from .build import BuildCommand  # noqa
File "...\venv\lib\python3.13\site-packages\briefcase\commands\build.py", line 5, in <module>
    from .base import BaseCommand, full_options
File "...\venv\lib\python3.13\site-packages\briefcase\commands\base.py", line 14, in <module>
    import faker
ModuleNotFoundError: No module named 'faker'
您無法在開發者模式下執行 Android 應用程式 - 請使用您所選擇的桌面平台說明。
您無法在開發者模式下執行 iOS 應用程式 - 請使用您所選擇的桌面平台說明。
發生什麼事了?我們在程式碼中添加了faker,卻未將其添加至用於開發模式下執行應用程式的虛擬環境中。
當 Briefcase 以開發模式執行應用程式時,會為該應用程式建立獨立的虛擬環境,此環境與您執行 briefcase
的環境互不干涉。若您的應用程式未聲明需要特定函式庫,該函式庫將不會安裝在開發虛擬環境中。
那麼,您該如何為應用程式新增一項新需求?
更新依賴項
在應用程式的根目錄中,有一個名為pyproject.toml的檔案。該檔案包含您最初執行briefcase new時提供的所有應用程式設定詳細資訊。
pyproject.toml 被分成幾個部分;其中一節描述了您的應用程式的設定::
[tool.briefcase.app.helloworld]
formal_name = "Hello World"
description = "A Tutorial app"
long_description = """More details about the app should go here.
"""
sources = ["src/helloworld"]
requires = []
requires 選項描述了我們應用的依賴關係。它是一組字串清單,用於指定您希望包含在應用程式中的函式庫(以及可選的函式庫版本)。
修改requires設置,使其顯示為:
requires = [
    "faker",
]
透過添加此設置,我們告訴 Briefcase當您建立我的應用程式時,在應用程式包中執行pip install httpx`。任何可以作為pip
install`合法輸入的內容都可以在這裡使用 - 因此,您可以指定:
- 特定的庫版本(例如
httpx==0.19.0); - 一系列庫版本(例如
httpx>=0.19); - git 儲存庫的路徑(例如,
"git+https://github.com/encode/httpx");或者 - 本機檔案路徑(但是 - 請注意:如果您將程式碼提供給其他人,則該路徑可能不會存在於他們的電腦上!)
在pyproject.toml中,您會注意到與作業系統相關的其他部分,例如[tool.briefcase.app.helloworld.macOS]和[tool.briefcase.app.helloworld.windows]。這些部分*也*有一個requires設定。這些設定允許您定義其他特定於平台的依賴項 -
因此,例如,如果您需要特定於平台的庫來處理應用程式的某些方面,您可以在特定於平台的requires部分中指定該庫,並且該設定將僅用於該平台。您會注意到toga庫都是在特定於平台的requires`部分中指定的
- 這是因為顯示使用者介面所需的庫是特定於平台的。
在我們的例子中,我們希望在所有平台上安裝httpx,因此我們使用應用程式層級requires設定。應用程式級相依性將始終被安裝;除了*應用程式層級的依賴項之外,還會安裝特定於平台的依賴項。
新增需求後,請儲存 pyproject.toml 並執行 briefcase dev -r。-r 標記會告知 Briefcase
需求已變更,需更新開發虛擬環境:
(beeware-venv) $ briefcase dev -r

[helloworld] Activating dev environment...
...
Recreating virtual environment (dev.cpython-313-darwin)... done

[hello-world] Installing requirements...
...

[helloworld] Starting in dev mode...
===========================================================================
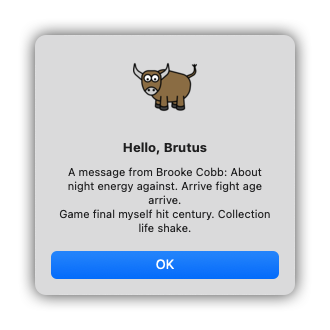
當您輸入名稱並按下按鈕時,您應該會看到一個類似以下內容的對話框:
 。
。
(beeware-venv) $ briefcase dev -r

[helloworld] Activating dev environment...
...
Recreating virtual environment (dev.cpython-313-x86_64-linux-gnu)... done

[hello-world] Installing requirements...
...

[helloworld] Starting in dev mode...
===========================================================================
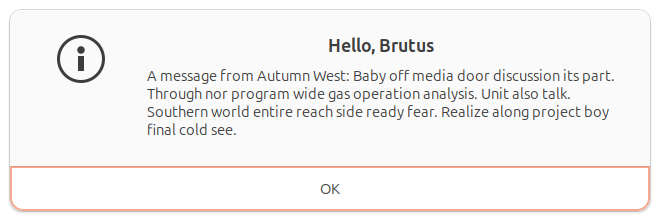
當您輸入名稱並按下按鈕時,您應該會看到一個類似以下內容的對話框:
(beeware-venv) C:\...>briefcase dev -r

[helloworld] Activating dev environment...
...
Recreating virtual environment (dev.cp313-win_amd64)... done

[hello-world] Installing requirements...
...

[helloworld] Starting in dev mode...
===========================================================================
當您輸入名稱並按下按鈕時,您應該會看到一個類似以下內容的對話框:
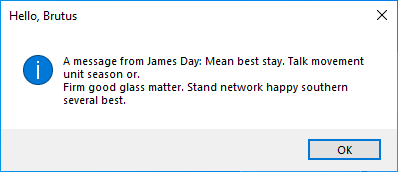 。
。
您無法在開發者模式下執行 Android 應用程式 - 請使用您所選擇的桌面平台說明。
您無法在開發者模式下執行 iOS 應用程式 - 請使用您所選擇的桌面平台說明。
執行 briefcase dev 時可能發生的錯誤
若執行 briefcase dev 時仍出現錯誤,請確認:
- 您已將
faker添加至requires; 中的pyproject.toml清單。 - 您已將變更儲存至
pyproject.toml; 以及 - 您在執行
-r時包含了briefcase dev -r參數。
當您首次使用 briefcase dev 執行應用程式時,系統會自動為您添加 -r 參數——這正是我們至今無需使用 -r
參數的原因。僅當您在開發模式下執行應用程式後,需要新增、移除或修改需求時,才需使用 -r 參數。若您僅更新程式碼,則可如本教學後續步驟所示,直接執行
briefcase dev 即可。
運行更新的應用程式
我們現在已擁有一個運作中的應用程式,使用第三方函式庫並以開發模式運行。接下來讓我們將此更新後的應用程式程式碼打包成獨立應用程式。由於我們已進行程式碼變更,需遵循與教學 4相同的步驟:
更新打包應用程式中的程式碼:
(beeware-venv) $ briefcase update

[helloworld] Updating application code...
...

[helloworld] Application updated.
重建應用程式:
(beeware-venv) $ briefcase build

[helloworld] Adhoc signing app...
[helloworld] Built build/helloworld/macos/app/Hello World.app
最後,運行應用程式:
(beeware-venv) $ briefcase run

[helloworld] Starting app...
===========================================================================
但是,當應用程式運行時,您會在控制台中看到錯誤,以及崩潰對話框:
Hello World Tutorial 7 應用程式當機,在 macOS 上](../images/macOS/tutorial-7-crash.png)。
更新打包應用程式中的程式碼:
(beeware-venv) $ briefcase update

[helloworld] Updating application code...
...

[helloworld] Application updated.
重建應用程式:
(beeware-venv) $ briefcase build

[helloworld] Finalizing application configuration...
...

[helloworld] Building application...
...

[helloworld] Built build/helloworld/linux/ubuntu/jammy/helloworld-0.0.1/usr/bin/helloworld
最後,運行應用程式:
(beeware-venv) $ briefcase run

[helloworld] Starting app...
===========================================================================
但是,當應用程式運行時,您會在控制台中看到錯誤:
Traceback (most recent call last):
  File "/usr/lib/python3.13/runpy.py", line 194, in _run_module_as_main
    return _run_code(code, main_globals, None,
  File "/usr/lib/python3.13/runpy.py", line 87, in _run_code
    exec(code, run_globals)
  File "/home/brutus/beeware-tutorial/helloworld/build/linux/ubuntu/jammy/helloworld-0.0.1/usr/app/hello_world/__main__.py", line 1, in <module>
    from helloworld.app import main
  File "/home/brutus/beeware-tutorial/helloworld/build/linux/ubuntu/jammy/helloworld-0.0.1/usr/app/hello_world/app.py", line 8, in <module>
    import faker
ModuleNotFoundError: No module named 'faker'

Unable to start app helloworld.
更新打包應用程式中的程式碼:
(beeware-venv) C:\...>briefcase update

[helloworld] Updating application code...
...

[helloworld] Application updated.
重建應用程式:
(beeware-venv) C:\...>briefcase build
...

[helloworld] Built build\helloworld\windows\app\src\Toga Test.exe
最後,運行應用程式:
(beeware-venv) C:\...>briefcase run

[helloworld] Starting app...
===========================================================================
但是,當應用程式運行時,您會在控制台中看到錯誤,以及崩潰對話框:
Hello World Tutorial 7 應用程式當機,在 Windows 上](../images/windows/tutorial-7-crash.png)。
更新打包應用程式中的程式碼:
(beeware-venv) $ briefcase update android

[helloworld] Updating application code...
...

[helloworld] Application updated.
重建應用程式:
(beeware-venv) $ briefcase build android

[helloworld] Updating app metadata...
...
[helloworld] Built build/helloworld/android/gradle/app/build/outputs/apk/debug/app-debug.apk
最後,執行應用程式(在提示時選擇模擬器):
(beeware-venv) $ briefcase run android

[helloworld] Following device log output (type CTRL-C to stop log)...
===========================================================================
但是,當應用程式運行時,您會在控制台中看到錯誤:
--------- beginning of crash
E/AndroidRuntime: FATAL EXCEPTION: main
E/AndroidRuntime: Process: com.example.helloworld, PID: 8289
E/AndroidRuntime: java.lang.RuntimeException: Unable to start activity ComponentInfo{com.example.helloworld/org.beeware.android.MainActivity}: com.chaquo.python.PyException: ModuleNotFoundError: No module named 'faker'
E/AndroidRuntime:   at android.app.ActivityThread.performLaunchActivity(ActivityThread.java:3635)
E/AndroidRuntime:   at android.app.ActivityThread.handleLaunchActivity(ActivityThread.java:3792)
E/AndroidRuntime:   at android.app.servertransaction.LaunchActivityItem.execute(LaunchActivityItem.java:103)
E/AndroidRuntime:   at android.app.servertransaction.TransactionExecutor.executeCallbacks(TransactionExecutor.java:135)
E/AndroidRuntime:   at android.app.servertransaction.TransactionExecutor.execute(TransactionExecutor.java:95)
E/AndroidRuntime:   at android.app.ActivityThread$H.handleMessage(ActivityThread.java:2210)
E/AndroidRuntime:   at android.os.Handler.dispatchMessage(Handler.java:106)
E/AndroidRuntime:   at android.os.Looper.loopOnce(Looper.java:201)
E/AndroidRuntime:   at android.os.Looper.loop(Looper.java:288)
E/AndroidRuntime:   at android.app.ActivityThread.main(ActivityThread.java:7839)
E/AndroidRuntime:   at java.lang.reflect.Method.invoke(Native Method)
E/AndroidRuntime:   at com.android.internal.os.RuntimeInit$MethodAndArgsCaller.run(RuntimeInit.java:548)
E/AndroidRuntime:   at com.android.internal.os.ZygoteInit.main(ZygoteInit.java:1003)
E/AndroidRuntime: Caused by: com.chaquo.python.PyException: ModuleNotFoundError: No module named 'faker'
E/AndroidRuntime:   at <python>.helloworld.app.<module>(app.py:8)
E/AndroidRuntime:   at <python>.java.chaquopy.import_override(import.pxi:60)
E/AndroidRuntime:   at <python>.__main__.<module>(__main__.py:1)
E/AndroidRuntime:   at <python>.runpy._run_code(<frozen runpy>:88)
E/AndroidRuntime:   at <python>.runpy._run_module_code(<frozen runpy>:98)
E/AndroidRuntime:   at <python>.runpy.run_module(<frozen runpy>:226)
E/AndroidRuntime:   at <python>.chaquopy_java.call(chaquopy_java.pyx:352)
E/AndroidRuntime:   at <python>.chaquopy_java.Java_com_chaquo_python_PyObject_callAttrThrowsNative(chaquopy_java.pyx:324)
E/AndroidRuntime:   at com.chaquo.python.PyObject.callAttrThrowsNative(Native Method)
E/AndroidRuntime:   at com.chaquo.python.PyObject.callAttrThrows(PyObject.java:232)
E/AndroidRuntime:   at com.chaquo.python.PyObject.callAttr(PyObject.java:221)
E/AndroidRuntime:   at org.beeware.android.MainActivity.onCreate(MainActivity.java:85)
E/AndroidRuntime:   at android.app.Activity.performCreate(Activity.java:8051)
E/AndroidRuntime:   at android.app.Activity.performCreate(Activity.java:8031)
E/AndroidRuntime:   at android.app.Instrumentation.callActivityOnCreate(Instrumentation.java:1329)
E/AndroidRuntime:   at android.app.ActivityThread.performLaunchActivity(ActivityThread.java:3608)
E/AndroidRuntime:   ... 12 more
I/Process : Sending signal. PID: 8289 SIG: 9
更新打包應用程式中的程式碼:
(beeware-venv) $ briefcase update iOS

[helloworld] Updating application code...
...

[helloworld] Application updated.
重建應用程式:
(beeware-venv) $ briefcase build iOS

[helloworld] Updating app metadata...
...
[helloworld] Built build/helloworld/ios/xcode/build/Debug-iphonesimulator/Hello World.app
最後,執行應用程式(在提示時選擇模擬器):
(beeware-venv) $ briefcase run iOS

...
[helloworld] Following simulator log output (type CTRL-C to stop log)...
===========================================================================
但是,當應用程式運行時,您會在控制台中看到錯誤:
Application has crashed!
========================
Traceback (most recent call last):
  File "/Users/rkm/Library/Developer/CoreSimulator/Devices/FD7EA28A-6D72-4064-9D8A-53CC8308BB6F/data/Containers/Bundle/Application/D9DD590B-DA32-4EE1-8F78-78658379CAB7/Hello World.app/app/helloworld/__main__.py", line 1, in <module>
    from helloworld.app import main
  File "/Users/rkm/Library/Developer/CoreSimulator/Devices/FD7EA28A-6D72-4064-9D8A-53CC8308BB6F/data/Containers/Bundle/Application/D9DD590B-DA32-4EE1-8F78-78658379CAB7/Hello World.app/app/helloworld/app.py", line 8, in <module>
    import faker
ModuleNotFoundError: No module named 'faker'
又一次,應用程式無法啟動,因為faker尚未安裝 - 但為什麼呢?我們不是已經安裝faker了嗎?
我們確實有——但僅限於開發環境。每個建置的應用程式皆擁有獨立的環境,這是執行 briefcase build 時 Briefcase
產生的元件之一。當我們執行 briefcase dev -r 時,僅將 faker 添加至我們的 開發 環境,而非打包後的應用程式。我們還需執行
briefcase update -r 以告知 Briefcase 打包應用程式的需求已變更:
(beeware-venv) $ briefcase update -r

[helloworld] Updating application code...
Installing src/hello_world...

[helloworld] Updating requirements...
Collecting faker
  Using cached faker-37.3.0-py3-none-any.whl.metadata (15 kB)
...
Installing collected packages: tzdata, travertino, std-nslog, rubicon-objc, fonttools, toga-core, faker, toga-cocoa
Successfully installed faker-37.3.0 fonttools-4.58.1 rubicon-objc-0.5.1 std-nslog-1.0.3 toga-cocoa-0.5.1 toga-core-0.5.1 travertino-0.5.1 tzdata-2025.2

[helloworld] Removing unneeded app content...
...

[helloworld] Application updated.
(beeware-venv) $ briefcase update -r

[helloworld] Finalizing application configuration...
Targeting ubuntu:jammy (Vendor base debian)
Determining glibc version... done
Targeting glibc 2.35
Targeting Python3.13

[helloworld] Updating application code...
Installing src/hello_world...

[helloworld] Updating requirements...
Collecting faker
  Using cached faker-37.3.0-py3-none-any.whl.metadata (15 kB)
...
Installing collected packages: tzdata, travertino, std-nslog, rubicon-objc, fonttools, toga-core, faker, toga-cocoa
Successfully installed faker-37.3.0 fonttools-4.58.1 rubicon-objc-0.5.1 std-nslog-1.0.3 toga-cocoa-0.5.1 toga-core-0.5.1 travertino-0.5.1 tzdata-2025.2

[helloworld] Removing unneeded app content...
...

[helloworld] Application updated.
(beeware-venv) C:\...>briefcase update -r

[helloworld] Updating application code...
Installing src/helloworld...

[helloworld] Updating requirements...
Collecting faker
  Using cached faker-37.3.0-py3-none-any.whl.metadata (15 kB)
...
Installing collected packages: tzdata, travertino, std-nslog, rubicon-objc, fonttools, toga-core, faker, toga-cocoa
Successfully installed faker-37.3.0 fonttools-4.58.1 rubicon-objc-0.5.1 std-nslog-1.0.3 toga-cocoa-0.5.1 toga-core-0.5.1 travertino-0.5.1 tzdata-2025.2

[helloworld] Removing unneeded app content...
...

[helloworld] Application updated.
(beeware-venv) $ briefcase update android -r

[helloworld] Updating application code...
Installing src/helloworld... done

[helloworld] Updating requirements...
Writing requirements file... done

[helloworld] Removing unneeded app content...
Removing unneeded app bundle content... done

[helloworld] Application updated.
(beeware-venv) $ briefcase update iOS -r

[helloworld] Updating application code...
Installing src/helloworld... done

[helloworld] Updating requirements...
Looking in indexes: https://pypi.org/simple, https://pypi.anaconda.org/beeware/simple
Collecting faker
  Using cached faker-37.4.0-py3-none-any.whl.metadata (15 kB)
...

Installing app requirements for iPhone simulator... done

[helloworld] Removing unneeded app content...
Removing unneeded app bundle content... done

[helloworld] Application updated.
更新後,您可以運行briefcase build和briefcase run - 您應該會看到打包的應用程序,具有新的對話框行為。
注意事項
用於更新需求的-r選項也受到build和run命令的支持,因此如果您想一步更新、構建和運行,您可以使用briefcase運行-u -r`。
適用於行動和網頁的第三方 Python 套件
Faker 只是協力廠商 Python 套件的一個範例,它是 Python 開箱即用之外的程式碼集合。這些第三方套件最常使用 Python Package
Index (PyPI) 來散佈,並安裝到您的本機虛擬環境中。我們在本教程中使用 pip,但也有其他選擇。
在桌面平台(macOS、Windows、Linux)上,任何可安裝的pip都可以加入您的需求。在行動和網路平台上,您的選擇略有限制。
簡而言之;任何 pure Python 套件 (即任何從 only 以 Python 撰寫的專案所建立的套件) 都可以毫無困難地使用。不過,有些套件是由包含 Python 與其他語言 (例如 C、C++、Rust 等) 的專案所建立的。以這些語言寫成的程式碼需要編譯成特定平台的二進位模組才能使用,而這些預先編譯好的二進位模組只能在特定平台上使用。行動和網頁平台的需求與「標準」桌上型平台有很大的不同。目前,大多數 Python 套件都不提供行動和網頁平台的預先編譯二進位模組。
在 PyPI 上,套件通常以預先建立的發行版格式提供,稱為 wheels。要檢查一個套件是否是純 Python,請查看專案的 PyPI 下載頁面。如果提供的
wheels 有 -py3-none-any.whl 後綴 (例如
Faker),那麼它們就是純 Python
wheels。但是,如果這些 wheels 有特定版本和平台的擴充套件 (例如
Pillow,它的 wheels 後綴是
-cp313-cp313-macosx_11_0_arm64.whl 和 cp39-cp39-win_amd64.whl),那麼這個 wheels *
包含一個二進位元件*。該套件無法安裝在行動或網頁平台上,除非已提供與這些平台相容的滾輪。
目前,PyPI 上*多的二進位套件並沒有提供行動或網頁相容的輪子。為了填補這個缺口,BeeWare 提供了一些熱門二進位模組的二進位檔 (包括
numpy、pandas 和 cryptography)。這些輪子 ** 並沒有散佈在 PyPI 上,但如果有的話,Briefcase
會安裝這些輪子。
BeeWare 可以為一些流行的二進位模組(包括numpy、pandas和cryptography)提供二進位檔案。 通常
可以為行動平台編譯軟體包,但設定起來並不容易——這遠遠超出了像本教程這樣的介紹性教程的範圍。
下一步
我們現在有了一個使用第三方函式庫的應用程式!在 教學 8 中,我們將學習如何在添加更複雜的應用程式邏輯時,確保我們的應用程式保持反應靈敏。