教程 7 - 使用第三方库
到目前为止,我们构建的应用程序只使用了我们自己的代码和 BeeWare 提供的代码。不过,在实际应用中,您很可能需要使用从 Python 软件包索引(PyPI)下载的第三方库。
让我们修改应用程序,加入第三方库。
添加软件包
让我们修改我们的应用程序,使其能够显示比“你好!”更丰富的内容。
为了给对话框生成一些更有趣的文本,我们将使用一个名为 Faker 的库。Faker 是一个 Python 软件包,用于生成虚假内容,包括名称和文本块。文本块中的名称和单词由 Faker 提供的任意单词列表生成。我们将使用 Faker 构建一条虚假信息,就像有人在回复用户一样。
我们开始吧 faker 添加到我们的应用程序中。在 app.py 的最上方加入一个导入,用于导入 faker:
import faker
然后修改 say_hello() 回调,使其看起来像这样:
async def say_hello(self, widget):
    fake = faker.Faker()
    await self.main_window.dialog(
        toga.InfoDialog(
            greeting(self.name_input.value),
            f"A message from {fake.name()}: {fake.text()}",
        )
    )
让我们在 Briefcase 开发者模式下运行更新后的应用程序,检查我们的更改是否有效。
(beeware-venv) $ briefcase dev
Traceback (most recent call last):
File ".../venv/bin/briefcase", line 5, in <module>
    from briefcase.__main__ import main
File ".../venv/lib/python3.13/site-packages/briefcase/__main__.py", line 3, in <module>
    from .cmdline import parse_cmdline
File ".../venv/lib/python3.13/site-packages/briefcase/cmdline.py", line 6, in <module>
    from briefcase.commands import DevCommand, NewCommand, UpgradeCommand
File ".../venv/lib/python3.13/site-packages/briefcase/commands/__init__.py", line 1, in <module>
    from .build import BuildCommand  # noqa
File ".../venv/lib/python3.13/site-packages/briefcase/commands/build.py", line 5, in <module>
    from .base import BaseCommand, full_options
File ".../venv/lib/python3.13/site-packages/briefcase/commands/base.py", line 14, in <module>
    import faker
ModuleNotFoundError: No module named 'faker'
(beeware-venv) C:\...>briefcase dev
Traceback (most recent call last):
File "...\venv\bin\briefcase", line 5, in <module>
    from briefcase.__main__ import main
File "...\venv\lib\python3.13\site-packages\briefcase\__main__.py", line 3, in <module>
    from .cmdline import parse_cmdline
File "...\venv\lib\python3.13\site-packages\briefcase\cmdline.py", line 6, in <module>
    from briefcase.commands import DevCommand, NewCommand, UpgradeCommand
File "...\venv\lib\python3.13\site-packages\briefcase\commands\__init__.py", line 1, in <module>
    from .build import BuildCommand  # noqa
File "...\venv\lib\python3.13\site-packages\briefcase\commands\build.py", line 5, in <module>
    from .base import BaseCommand, full_options
File "...\venv\lib\python3.13\site-packages\briefcase\commands\base.py", line 14, in <module>
    import faker
ModuleNotFoundError: No module named 'faker'
您无法在开发者模式下运行 Android 应用程序,请使用所选桌面平台的说明。
您无法在开发者模式下运行 iOS 应用程序,请使用所选桌面平台的说明。
发生了什么?我们在代码中添加了faker,但尚未将其添加到用于在开发模式下运行应用程序的虚拟环境中。
当 Briefcase 以开发模式运行应用程序时,它会为该应用创建一个独立的虚拟环境,该环境与您运行 briefcase
的环境无关。如果您的应用未声明需要特定库,则该库不会安装在开发虚拟环境中。
那么,如何向应用程序添加新需求呢?
更新依赖项
在应用程序的根目录中,有一个名为 pyproject.toml 的文件。该文件包含您最初运行 briefcase new
时提供的所有应用程序配置详细信息。
pyproject.toml "分为多个部分,其中一部分描述了应用程序的设置::
[tool.briefcase.app.helloworld]
formal_name = "Hello World"
description = "A Tutorial app"
long_description = """More details about the app should go here.
"""
sources = ["src/helloworld"]
requires = []
requires选项描述了应用程序的依赖关系。它是一组字符串列表,用于指定需要包含在应用程序中的库(以及可选的库版本)。
修改 requires 设置为::
requires = [
    "faker",
]
通过添加此设置,我们告诉 Briefcase "当你构建我的应用程序时,运行 pip install httpx 到应用程序捆绑包中"。任何可以合法输入到
pip install 的内容都可以在这里使用–因此,你可以指定:
- 特定的库版本(例如,
"httpx===0.19.0"); - 一系列库版本(例如,
"httpx>=0.19"); - 指向 git 仓库的路径(例如,
"git+https://github.com/encode/httpx");或 - 本地文件路径(不过需要注意的是:如果你把代码交给别人,这个路径很可能不存在于他们的机器上!)
在 pyproject.toml 中的更下面部分,你会注意到与操作系统相关的其他部分,如
[tool.briefcase.app.helloworld.macOS] 和
[tool.briefcase.app.helloworld.windows]。这些部分**也有一个 requires
设置。这些设置允许你定义额外的特定平台依赖关系,例如,如果你需要一个特定平台的库来处理应用程序的某些方面,你可以在特定平台的 requires
部分中指定该库,而该设置将仅用于该平台。你会注意到,所有的 toga 库都是在特定平台的 requires
部分中指定的,这是因为显示用户界面所需的库都是特定平台的。
在我们的例子中,我们希望 httpx 安装在所有平台上,因此使用了应用程序级的 requires
设置。应用程序级的依赖项始终会被安装;特定平台的依赖项会在应用程序级的依赖项之外*安装。
添加新依赖项后,请保存 pyproject.toml, 并运行 briefcase dev -r. -r 标志会告知 Briefcase
依赖项已变更,需要更新开发虚拟环境:
(beeware-venv) $ briefcase dev -r

[helloworld] Activating dev environment...
...
Recreating virtual environment (dev.cpython-313-darwin)... done

[hello-world] Installing requirements...
...

[helloworld] Starting in dev mode...
===========================================================================
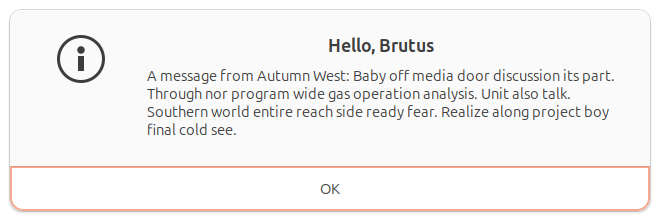
输入名称并按下按钮后,您会看到一个类似如下的对话框:
Hello World 教程 7 对话框,在 macOS 上](../images/macOS/tutorial-7.png)。
(beeware-venv) $ briefcase dev -r

[helloworld] Activating dev environment...
...
Recreating virtual environment (dev.cpython-313-x86_64-linux-gnu)... done

[hello-world] Installing requirements...
...

[helloworld] Starting in dev mode...
===========================================================================
输入名称并按下按钮后,您会看到一个类似如下的对话框:
 。
。
(beeware-venv) C:\...>briefcase dev -r

[helloworld] Activating dev environment...
...
Recreating virtual environment (dev.cp313-win_amd64)... done

[hello-world] Installing requirements...
...

[helloworld] Starting in dev mode...
===========================================================================
输入名称并按下按钮后,您会看到一个类似如下的对话框:
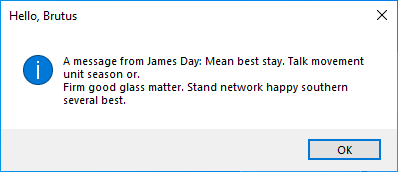 !
!
您无法在开发者模式下运行 Android 应用程序,请使用所选桌面平台的说明。
您无法在开发者模式下运行 iOS 应用程序,请使用所选桌面平台的说明。
运行 briefcase dev 时可能出现的错误
如果运行 briefcase dev 时仍出现错误,请确保:
- 您已将
faker添加到requires列表中的pyproject.toml; - 您已将更改保存至
pyproject.toml; 并 - 你在运行
-r时包含了briefcase dev -r参数。
首次使用 briefcase dev 运行应用程序时,系统会自动添加 -r 参数——这正是我们此前无需使用 -r
参数的原因。仅当您在开发模式下运行应用程序后,需要添加、移除或修改依赖项时,才需要使用 -r 参数。若您仅更新了代码,则可照常运行 briefcase
dev,本教程后续部分均采用此方式。
运行更新后的应用程序
我们现已获得一个使用第三方库、在开发模式下运行的可工作应用程序。接下来,让我们将这个更新后的应用程序代码打包为独立应用。由于我们进行了代码修改,需要遵循与教程4相同的步骤:
更新打包应用程序中的代码:
(beeware-venv) $ briefcase update

[helloworld] Updating application code...
...

[helloworld] Application updated.
重建应用程序:
(beeware-venv) $ briefcase build

[helloworld] Adhoc signing app...
[helloworld] Built build/helloworld/macos/app/Hello World.app
最后,运行应用程序:
(beeware-venv) $ briefcase run

[helloworld] Starting app...
===========================================================================
但是,当程序运行时,你会在控制台中看到一个错误,还有一个崩溃对话框:
你好世界教程 7》应用程序崩溃,在 macOS 上](../images/macOS/tutorial-7-crash.png)。
更新打包应用程序中的代码:
(beeware-venv) $ briefcase update

[helloworld] Updating application code...
...

[helloworld] Application updated.
重建应用程序:
(beeware-venv) $ briefcase build

[helloworld] Finalizing application configuration...
...

[helloworld] Building application...
...

[helloworld] Built build/helloworld/linux/ubuntu/jammy/helloworld-0.0.1/usr/bin/helloworld
最后,运行应用程序:
(beeware-venv) $ briefcase run

[helloworld] Starting app...
===========================================================================
但是,当应用程序运行时,您会在控制台中看到一个错误:
Traceback (most recent call last):
  File "/usr/lib/python3.13/runpy.py", line 194, in _run_module_as_main
    return _run_code(code, main_globals, None,
  File "/usr/lib/python3.13/runpy.py", line 87, in _run_code
    exec(code, run_globals)
  File "/home/brutus/beeware-tutorial/helloworld/build/linux/ubuntu/jammy/helloworld-0.0.1/usr/app/hello_world/__main__.py", line 1, in <module>
    from helloworld.app import main
  File "/home/brutus/beeware-tutorial/helloworld/build/linux/ubuntu/jammy/helloworld-0.0.1/usr/app/hello_world/app.py", line 8, in <module>
    import faker
ModuleNotFoundError: No module named 'faker'

Unable to start app helloworld.
更新打包应用程序中的代码:
(beeware-venv) C:\...>briefcase update

[helloworld] Updating application code...
...

[helloworld] Application updated.
重建应用程序:
(beeware-venv) C:\...>briefcase build
...

[helloworld] Built build\helloworld\windows\app\src\Toga Test.exe
最后,运行应用程序:
(beeware-venv) C:\...>briefcase run

[helloworld] Starting app...
===========================================================================
但是,当程序运行时,你会在控制台中看到一个错误,还有一个崩溃对话框:
Hello World教程7应用程序崩溃,在Windows上](../images/windows/tutorial-7-crash.png)。
更新打包应用程序中的代码:
(beeware-venv) $ briefcase update android

[helloworld] Updating application code...
...

[helloworld] Application updated.
重建应用程序:
(beeware-venv) $ briefcase build android

[helloworld] Updating app metadata...
...
[helloworld] Built build/helloworld/android/gradle/app/build/outputs/apk/debug/app-debug.apk
最后,运行应用程序(根据提示选择模拟器):
(beeware-venv) $ briefcase run android

[helloworld] Following device log output (type CTRL-C to stop log)...
===========================================================================
但是,当应用程序运行时,您会在控制台中看到一个错误:
--------- beginning of crash
E/AndroidRuntime: FATAL EXCEPTION: main
E/AndroidRuntime: Process: com.example.helloworld, PID: 8289
E/AndroidRuntime: java.lang.RuntimeException: Unable to start activity ComponentInfo{com.example.helloworld/org.beeware.android.MainActivity}: com.chaquo.python.PyException: ModuleNotFoundError: No module named 'faker'
E/AndroidRuntime:   at android.app.ActivityThread.performLaunchActivity(ActivityThread.java:3635)
E/AndroidRuntime:   at android.app.ActivityThread.handleLaunchActivity(ActivityThread.java:3792)
E/AndroidRuntime:   at android.app.servertransaction.LaunchActivityItem.execute(LaunchActivityItem.java:103)
E/AndroidRuntime:   at android.app.servertransaction.TransactionExecutor.executeCallbacks(TransactionExecutor.java:135)
E/AndroidRuntime:   at android.app.servertransaction.TransactionExecutor.execute(TransactionExecutor.java:95)
E/AndroidRuntime:   at android.app.ActivityThread$H.handleMessage(ActivityThread.java:2210)
E/AndroidRuntime:   at android.os.Handler.dispatchMessage(Handler.java:106)
E/AndroidRuntime:   at android.os.Looper.loopOnce(Looper.java:201)
E/AndroidRuntime:   at android.os.Looper.loop(Looper.java:288)
E/AndroidRuntime:   at android.app.ActivityThread.main(ActivityThread.java:7839)
E/AndroidRuntime:   at java.lang.reflect.Method.invoke(Native Method)
E/AndroidRuntime:   at com.android.internal.os.RuntimeInit$MethodAndArgsCaller.run(RuntimeInit.java:548)
E/AndroidRuntime:   at com.android.internal.os.ZygoteInit.main(ZygoteInit.java:1003)
E/AndroidRuntime: Caused by: com.chaquo.python.PyException: ModuleNotFoundError: No module named 'faker'
E/AndroidRuntime:   at <python>.helloworld.app.<module>(app.py:8)
E/AndroidRuntime:   at <python>.java.chaquopy.import_override(import.pxi:60)
E/AndroidRuntime:   at <python>.__main__.<module>(__main__.py:1)
E/AndroidRuntime:   at <python>.runpy._run_code(<frozen runpy>:88)
E/AndroidRuntime:   at <python>.runpy._run_module_code(<frozen runpy>:98)
E/AndroidRuntime:   at <python>.runpy.run_module(<frozen runpy>:226)
E/AndroidRuntime:   at <python>.chaquopy_java.call(chaquopy_java.pyx:352)
E/AndroidRuntime:   at <python>.chaquopy_java.Java_com_chaquo_python_PyObject_callAttrThrowsNative(chaquopy_java.pyx:324)
E/AndroidRuntime:   at com.chaquo.python.PyObject.callAttrThrowsNative(Native Method)
E/AndroidRuntime:   at com.chaquo.python.PyObject.callAttrThrows(PyObject.java:232)
E/AndroidRuntime:   at com.chaquo.python.PyObject.callAttr(PyObject.java:221)
E/AndroidRuntime:   at org.beeware.android.MainActivity.onCreate(MainActivity.java:85)
E/AndroidRuntime:   at android.app.Activity.performCreate(Activity.java:8051)
E/AndroidRuntime:   at android.app.Activity.performCreate(Activity.java:8031)
E/AndroidRuntime:   at android.app.Instrumentation.callActivityOnCreate(Instrumentation.java:1329)
E/AndroidRuntime:   at android.app.ActivityThread.performLaunchActivity(ActivityThread.java:3608)
E/AndroidRuntime:   ... 12 more
I/Process : Sending signal. PID: 8289 SIG: 9
更新打包应用程序中的代码:
(beeware-venv) $ briefcase update iOS

[helloworld] Updating application code...
...

[helloworld] Application updated.
重建应用程序:
(beeware-venv) $ briefcase build iOS

[helloworld] Updating app metadata...
...
[helloworld] Built build/helloworld/ios/xcode/build/Debug-iphonesimulator/Hello World.app
最后,运行应用程序(根据提示选择模拟器):
(beeware-venv) $ briefcase run iOS

...
[helloworld] Following simulator log output (type CTRL-C to stop log)...
===========================================================================
但是,当应用程序运行时,您会在控制台中看到一个错误:
Application has crashed!
========================
Traceback (most recent call last):
  File "/Users/rkm/Library/Developer/CoreSimulator/Devices/FD7EA28A-6D72-4064-9D8A-53CC8308BB6F/data/Containers/Bundle/Application/D9DD590B-DA32-4EE1-8F78-78658379CAB7/Hello World.app/app/helloworld/__main__.py", line 1, in <module>
    from helloworld.app import main
  File "/Users/rkm/Library/Developer/CoreSimulator/Devices/FD7EA28A-6D72-4064-9D8A-53CC8308BB6F/data/Containers/Bundle/Application/D9DD590B-DA32-4EE1-8F78-78658379CAB7/Hello World.app/app/helloworld/app.py", line 8, in <module>
    import faker
ModuleNotFoundError: No module named 'faker'
又一次,应用程序无法启动,因为faker尚未安装–但为什么呢?我们不是已经安装了 faker吗?
我们确实有——但仅限于开发环境。每个构建的应用程序都有其独立的运行环境,这是运行briefcase
build时Briefcase生成的组件之一。当我们执行briefcase dev
-r时,仅将faker添加到开发环境中,而未添加到打包应用程序。我们还需运行briefcase update
-r,以便Briefcase识别打包应用程序的依赖项已发生变更:
(beeware-venv) $ briefcase update -r

[helloworld] Updating application code...
Installing src/hello_world...

[helloworld] Updating requirements...
Collecting faker
  Using cached faker-37.3.0-py3-none-any.whl.metadata (15 kB)
...
Installing collected packages: tzdata, travertino, std-nslog, rubicon-objc, fonttools, toga-core, faker, toga-cocoa
Successfully installed faker-37.3.0 fonttools-4.58.1 rubicon-objc-0.5.1 std-nslog-1.0.3 toga-cocoa-0.5.1 toga-core-0.5.1 travertino-0.5.1 tzdata-2025.2

[helloworld] Removing unneeded app content...
...

[helloworld] Application updated.
(beeware-venv) $ briefcase update -r

[helloworld] Finalizing application configuration...
Targeting ubuntu:jammy (Vendor base debian)
Determining glibc version... done
Targeting glibc 2.35
Targeting Python3.13

[helloworld] Updating application code...
Installing src/hello_world...

[helloworld] Updating requirements...
Collecting faker
  Using cached faker-37.3.0-py3-none-any.whl.metadata (15 kB)
...
Installing collected packages: tzdata, travertino, std-nslog, rubicon-objc, fonttools, toga-core, faker, toga-cocoa
Successfully installed faker-37.3.0 fonttools-4.58.1 rubicon-objc-0.5.1 std-nslog-1.0.3 toga-cocoa-0.5.1 toga-core-0.5.1 travertino-0.5.1 tzdata-2025.2

[helloworld] Removing unneeded app content...
...

[helloworld] Application updated.
(beeware-venv) C:\...>briefcase update -r

[helloworld] Updating application code...
Installing src/helloworld...

[helloworld] Updating requirements...
Collecting faker
  Using cached faker-37.3.0-py3-none-any.whl.metadata (15 kB)
...
Installing collected packages: tzdata, travertino, std-nslog, rubicon-objc, fonttools, toga-core, faker, toga-cocoa
Successfully installed faker-37.3.0 fonttools-4.58.1 rubicon-objc-0.5.1 std-nslog-1.0.3 toga-cocoa-0.5.1 toga-core-0.5.1 travertino-0.5.1 tzdata-2025.2

[helloworld] Removing unneeded app content...
...

[helloworld] Application updated.
(beeware-venv) $ briefcase update android -r

[helloworld] Updating application code...
Installing src/helloworld... done

[helloworld] Updating requirements...
Writing requirements file... done

[helloworld] Removing unneeded app content...
Removing unneeded app bundle content... done

[helloworld] Application updated.
(beeware-venv) $ briefcase update iOS -r

[helloworld] Updating application code...
Installing src/helloworld... done

[helloworld] Updating requirements...
Looking in indexes: https://pypi.org/simple, https://pypi.anaconda.org/beeware/simple
Collecting faker
  Using cached faker-37.4.0-py3-none-any.whl.metadata (15 kB)
...

Installing app requirements for iPhone simulator... done

[helloworld] Removing unneeded app content...
Removing unneeded app bundle content... done

[helloworld] Application updated.
更新完成后,您可以运行 briefcase build 和 briefcase run - 您应该会看到打包后的应用程序,并带有新的对话框行为。
备注
用于更新需求的 -r 选项也会被 build 和 run 命令接受,因此如果你想一步完成更新、编译和运行,可以使用 briefcase run
-u -r。
用于移动和网络的第三方 Python 软件包
Faker 只是第三方 Python 软件包的一个例子,它是 Python 开箱即用之外的代码集合。这些第三方软件包通常使用 Python Package
Index (PyPI) 发布,并安装到本地虚拟环境中。我们在本教程中使用了 pip,但也有其他选择。
在桌面平台(macOS、Windows、Linux)上,任何可安装的 "pip "都可以添加到您的需求中。在移动和网络平台上,您的选择略显有限。
简而言之,任何纯 Python 包(即从仅用 Python 编写的项目中创建的包)都可以毫无困难地使用。不过,有些软件包是由包含 Python 和其他语言(如 C、C++、Rust 等)的项目创建的。使用这些语言编写的代码需要编译成特定平台的二进制模块才能使用,而这些预编译的二进制模块只能在特定平台上使用。移动平台和网络平台的要求与 "标准 "桌面平台截然不同。目前,大多数 Python 软件包都没有为移动平台和网络平台提供预编译二进制文件。
在 PyPI 上,软件包通常以一种名为 wheels 的预构建发布格式提供。要检查某个软件包是否是纯 Python,请查看该项目的 PyPI
下载页面。如果提供的轮子后缀是 -py3-none-any.whl(例如
Faker),那么它们就是纯 Python
轮子。但是,如果这些轮子有特定版本和平台的扩展(例如
Pillow,它的轮子后缀是
-cp313-cp313-macosx_11_0_arm64.whl 和
cp39-cp39-win_amd64.whl),那么这个轮子包含一个二进制组件。除非提供了与移动或网络平台兼容的滚轮,否则该软件包无法安装在这些平台上。
目前,PyPI上多的二进制包都没有提供移动或网络兼容的轮子。为了填补这一空白,BeeWare 为一些流行的二进制模块(包括 numpy、pandas
和 cryptography)提供了二进制文件。这些轮子没有发布在 PyPI 上,但如果这些轮子可用,Briefcase 会安装它们。
通常\ 可以为移动平台编译二进制软件包,但是不容易设置,且远超出了本教程这样的入门教程涵盖的范围。
下一步
我们现在有了一个使用第三方库的应用程序!在 教程 8 中,我们将学习如何在添加更复杂的应用程序逻辑时确保应用程序保持响应。